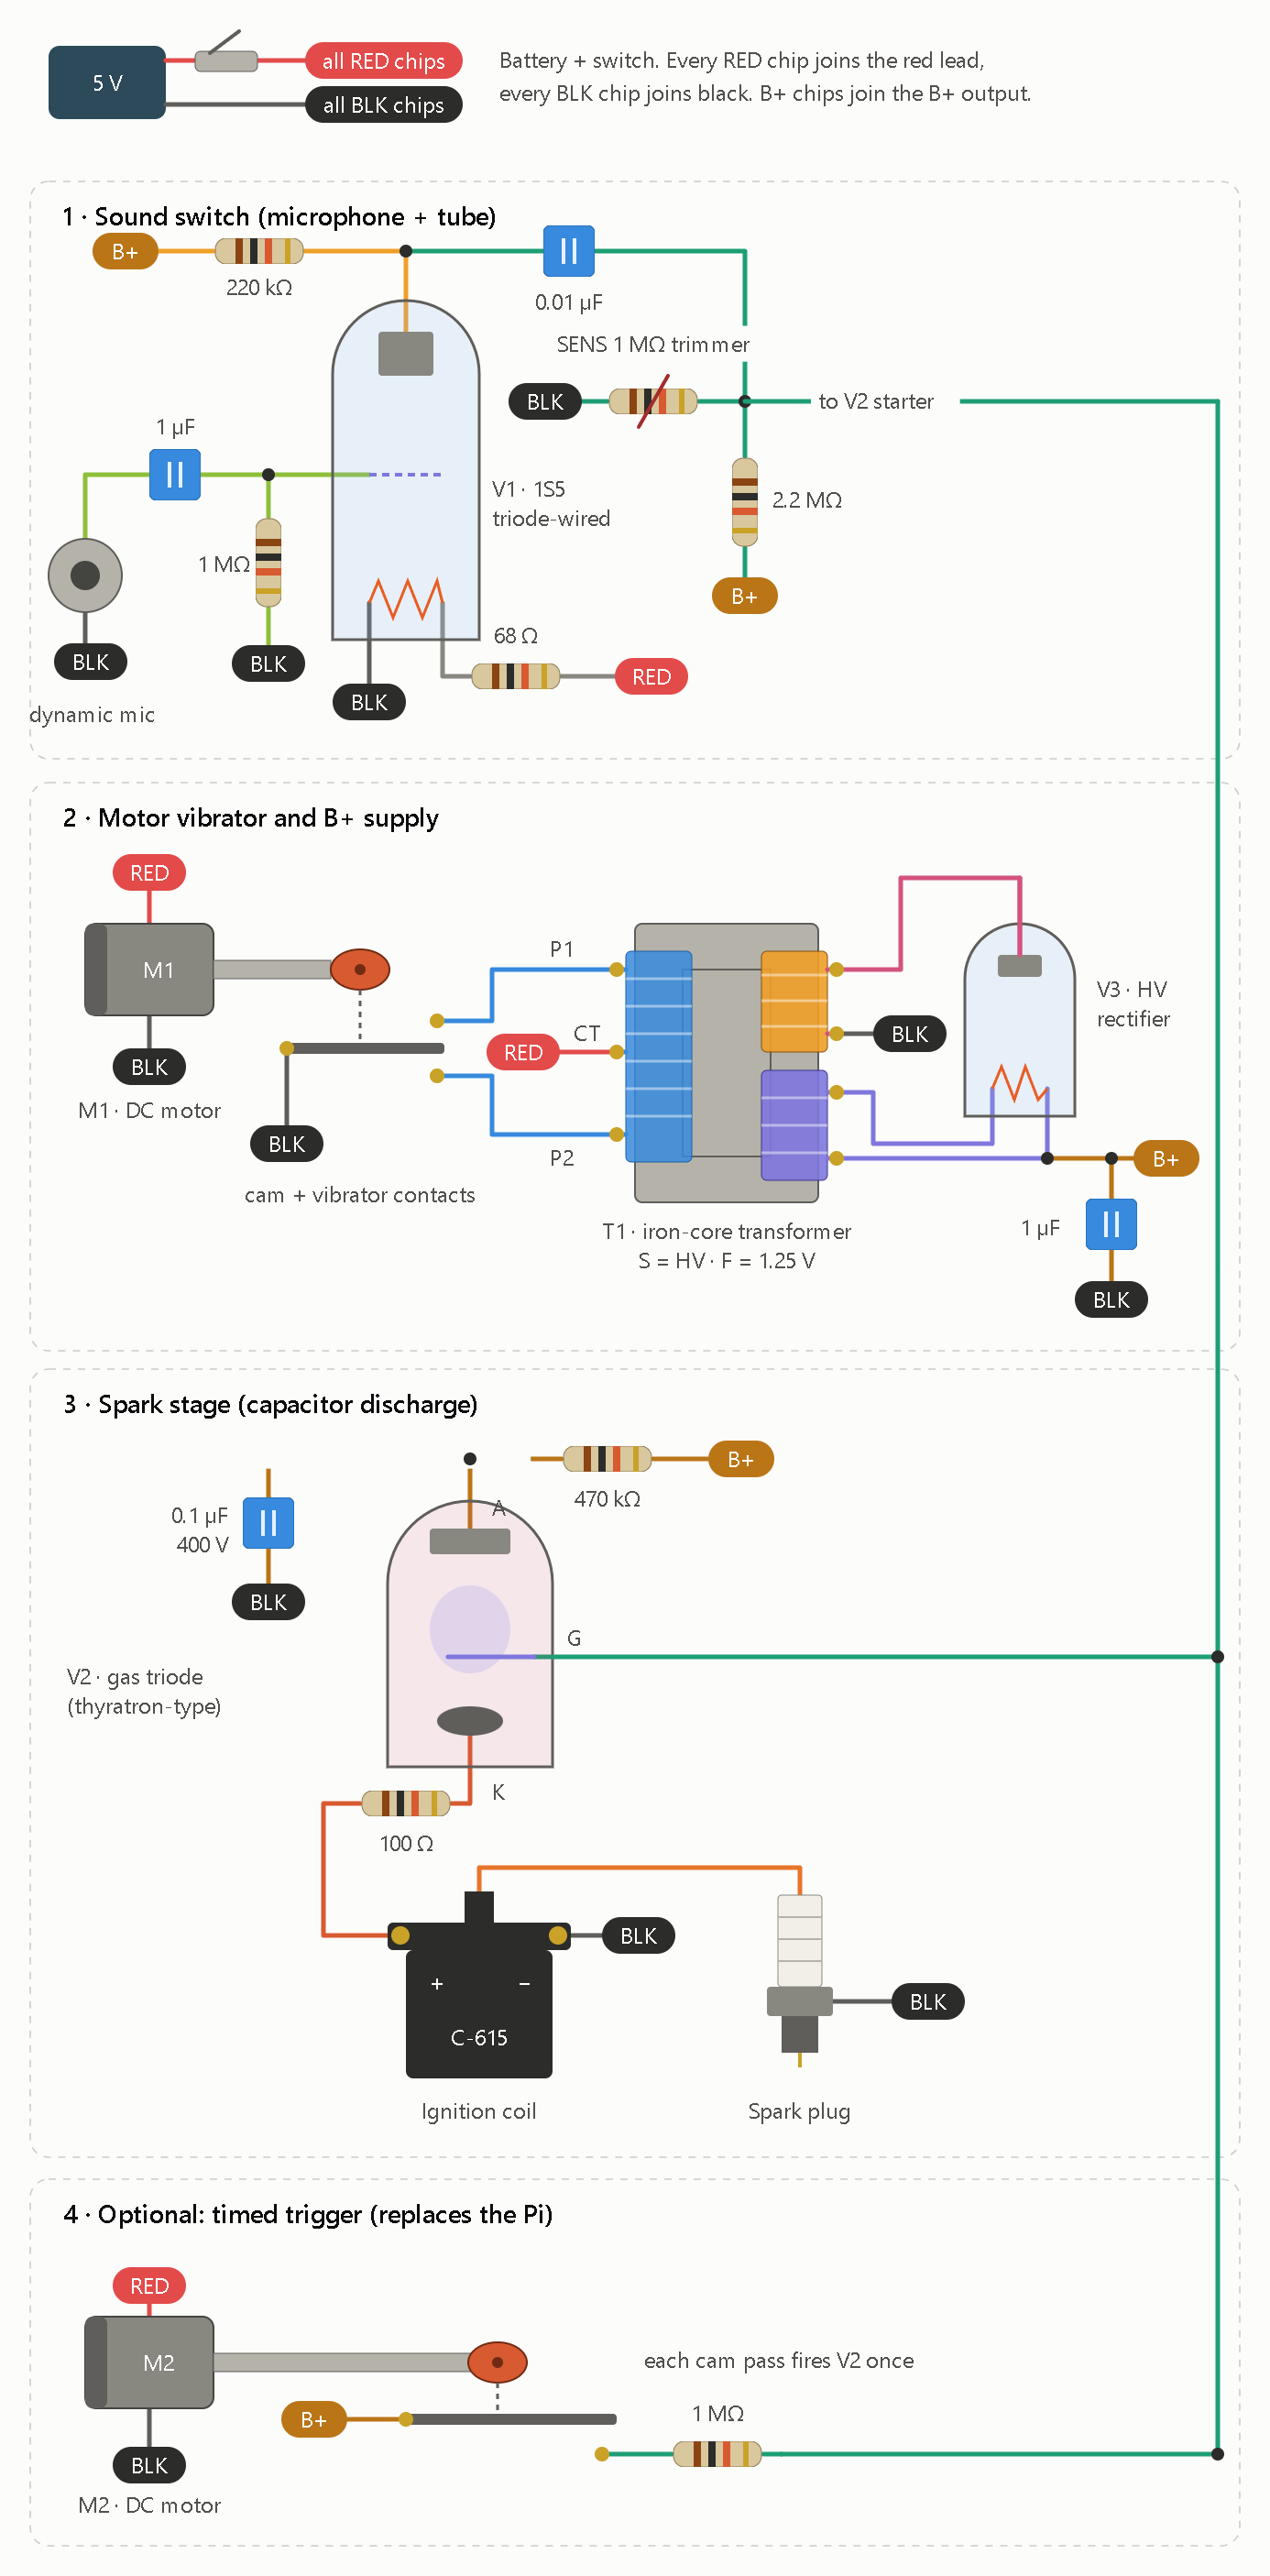
I drew it in the same chip-and-component style as your schematic, with the stages renumbered 1 to 4. It uses only DC motors and vacuum tubes, and no lamps.
The drawing shows these stages:
- Sound switch: a dynamic mic feeds a 1S5 tube with its screen tied to the plate. Its output drives the starter of a gas triode (V2) through a SENS trimmer set just below the strike point. This is a threshold, so it responds to claps and sharp sounds, not sustained noise.
- B+ supply: motor M1 turns a cam that rocks vibrator contacts across a center-tapped iron-core transformer. A tube rectifier (V3) turns that into about 150 to 300 V of B+.
- Spark stage: B+ charges a 0.1 µF capacitor through 470 kΩ. When V2 fires, the capacitor dumps through 100 Ω into the C-615 coil and spark plug.
- Timed trigger: M2 and a cam close a contact that pushes the starter over its threshold on a schedule, replacing the Pi and PC817.
A few things to know before you build it:
- The toroid is gone. I told you earlier that the toroid could take an extra winding, and that was wrong. A cam only switches about 100 to 300 times a second, and a ferrite toroid needs kilohertz or it saturates. T1 is a laminated iron-core transformer instead, and a small mains or filament transformer run in reverse is the cheap way to get one.
- All the tube values are starting points. I haven’t verified a datasheet for any of them.
- V1: the 1S5, with the 68 Ω dropper from 5V to its 1.4 V filament.
- V3: the HV rectifier, which needs the filament winding F on T1. Check its filament voltage and current.
- V2: the gas triode. Check its starter strike voltage and peak current.
- Limit the discharge current. A 0.1 µF capacitor at 200 V into the coil primary can peak above what a small gas tube allows. Start with a smaller capacitor, or raise the 100 Ω, until the tube is within its rating.
- Add a condenser across the vibrator contacts. About 0.1 µF, as in an ignition system. I left it off the drawing to keep the wiring clear.
- Power draw is higher. The motors and the rectifier filament add up, so use a proper 5V supply rather than a small battery.